my favorite things

my favorite things
Showing posts with label mixed media. Show all posts

Monday, April 4, 2016

Mood Board Mixed Media

It's Pinspire Me Monday at Paper Issues. I was instantly smitten with the image of the beautiful flowers on the mood board. To see the stunning mood board, check out the Paper Issues blog. I thought it would be fun to do a mixed-media project and the Bella Blvd. Illustrated Faith (She Blooms) patterned paper was perfect for the project! I had an old canvas lying around that was never finished so I grabbed it and put a coat of gesso on it. I fussy-cut several flowers and hand-cut stems, leaves, and the vase. I played around with flower placement until I was happy and took a quick photo with my phone for reference.


I pulled out acrylic paints and started layering paint on top of the flowers to make them pop and add dimension to the piece. I wanted to keep the clean, fresh look of the inspiration image, so I didn't get too messy with it. I absolutely love the end result. I decided to hand it on my craft room door because it makes me happy!


As you can see, I also painted on the sides and wrapped some flowers & leaves around the edge. It's a fun, little detail that I love to add, especially if the canvas will be seen from the side. I adore this paper so much that I also created a layout with it! It will be on the Paper Issues blog in a couple of weeks. Lots of fun things happening at Paper Issues... ISpywithPI started a few days ago. Be sure to join the FB group and share all your gorgeous spring photos. You'll definitely be inspired to scrap and more importantly, have beautiful photos to jump-start your mojo!

Friday, February 5, 2016

Mood Board Inspiration

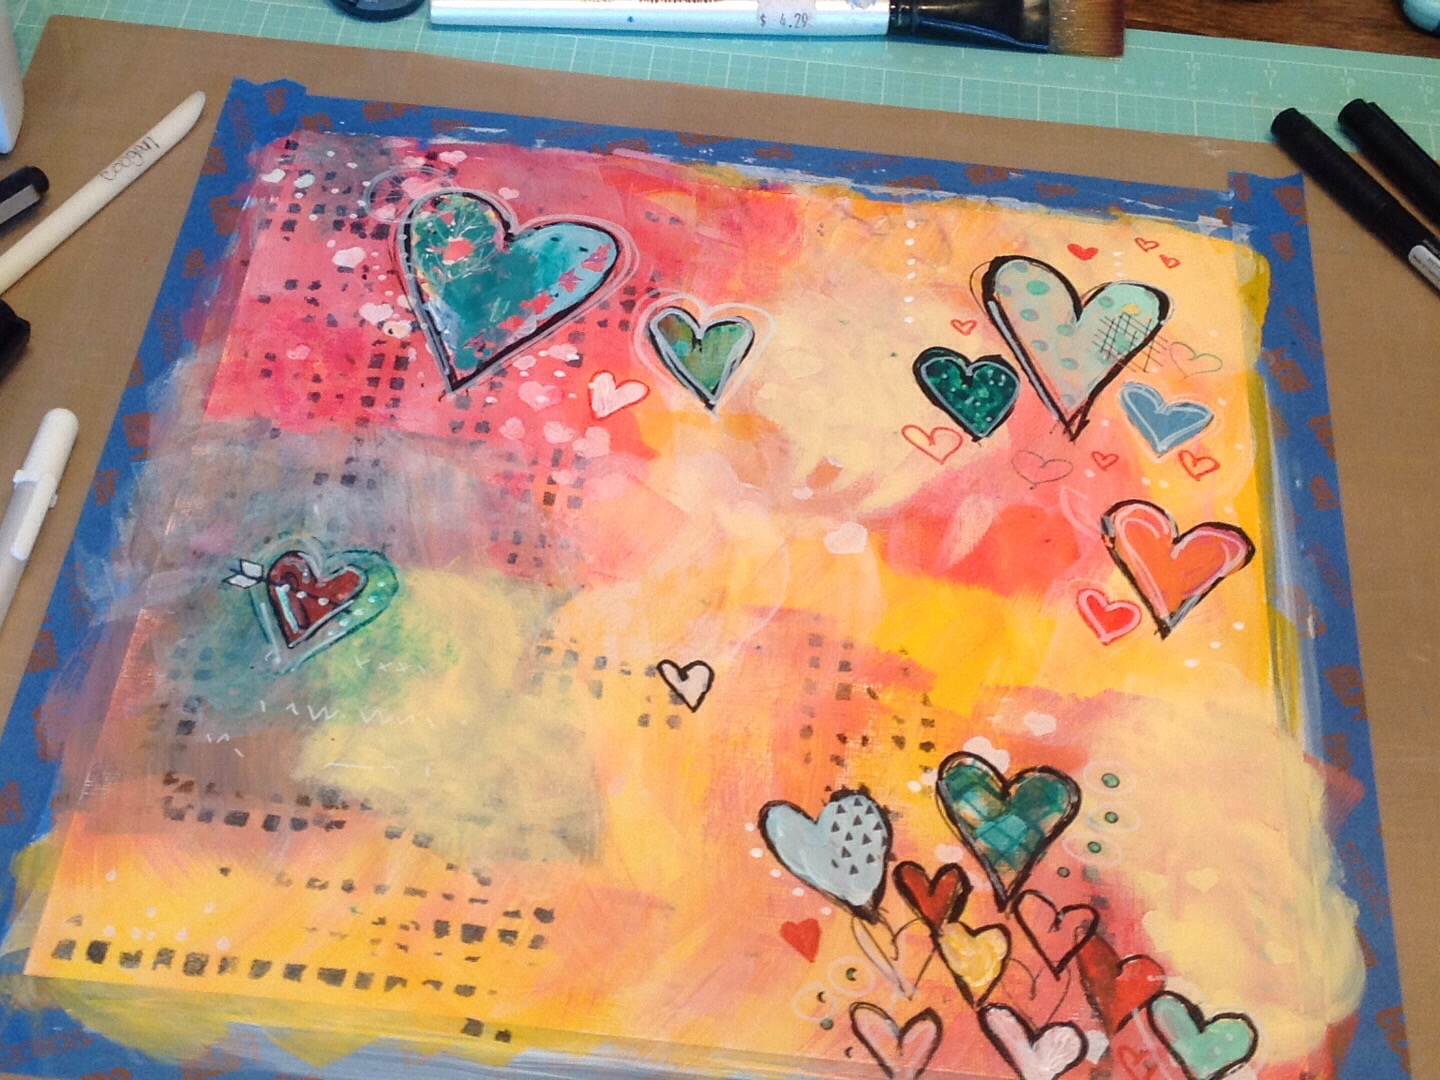
Do you love mood board inspiration as much as I do? Today, at Paper Issues, the February mood board is up and it's gorgeous! When Mary-Ann first posted it, I gasped and was instantly inspired by the colorful, whimsical hearts on the bottom right.


Since I knew I was be adding several mixed media layers, I started with Strathmore Acrylic paper, 246 lb. To keep it from warping, I taped it down to a board and also added a layer of gesso to prep the paper. For color inspiration, I used a photo of my cat, sitting on my lap in my craft room. I grabbed several paints, stencils (The Crafter's Workshop & Heidi Swapp), rub-ons, waterproof pens, stamps, and started playing.


At one point, I couldn't decide if I loved or hated it, but I kept pressing on and I'm so glad I did. Since the background is so busy, I matted the photo with patterned paper (Shimelle) and used the glassine bag from my Paper Issues Swag Bag. The Amy Tangerine foam Thickers were perfect for the layout but too white and clean, so I got messy and altered them. For the finishing touches, I added the ribbon clip from the January Swag Bag and the wooden arrow/heart from Crate Paper's Hello, Love collection.


I had such a blast getting dirty with this mood board! Although my scrap style is typically clean and photo-focused, it's fun to let loose and mix it up from time to time. I hope you're as inspired by this beautiful board as I was. Be sure to add your creations to the Paper Issues {Friends & Fans} Facebook page - you may win a store gift certificate! If you have any questions, please feel free to leave them in the comments. To see more Pinspire Me creations by the Paper Issues DT, click here. Wishing you a lovely, creative day!

Tuesday, October 13, 2015

Everyday Inspiration

Last week we were outside enjoying the most beautiful weather and my daughter started gathering colorful leaves. She created word art with the leaves and the end result was stunning! I was instantly inspired by it and knew I wanted to create a layout - not only to document the moment, but to replicate the look. Here is a photo of her leaf art:


I cut some leaves using my Silhouette Cameo and used watercolors to paint them (totally inspired by a Wed w/Wilna YouTube video).


I fussy-cut the title from a photo of the leaf art. A simple scattering of leaves, a few embellishments from Pink Paislee's Cedar Lane collection, and the layout was complete. I love this layout for many reasons, but capturing the spontaneous moment with my daughter and finding the beauty in it is something I'll always treasure. If you'd like to see more of the process, please check out my YouTube videos here. As always, thank you for stopping by my blog! It's another beautiful autumn day here, I plan to enjoy it! ♥

Saturday, February 7, 2015

Embossing with a Stencil

This month's Color Kit at Hip Kit Club included a Dear Lizzy stencil. It's such a lovely design, full of flowers/leaves and I knew I wanted to individually paint them. Typically stencils are used with paints/mists over them. To enhance the design of the stencil, I used VersaMark on the back side of the stencil and placed it on watercolor paper. A brayer was used to ensure even coverage of the VersaMark. I then poured Zing embossing powder (white) over the image and heat set it. The result is stunning. I almost didn't paint it because it was so pretty with white on white.


The next step was to have fun painting. I used Gelatos and NeoColors to watercolor the image. Since it's white on white, it's initially hard to distinguish the flowers from the leaves. Keep the stencil close at hand to help see the design.


Since the painted page is so colorful, I decided to use minimal embellishments on the page. Watching the pattern come alive as I was painting, was so exciting. That is how I emboss with stencils, you can get a completely different look this way, and the end result is amazing!

Friday, January 16, 2015

Gelatos - From Epic Fail to Fabulous!

I started to title this post, "How NOT to use Gelatos", but I thought I should offer some hope. This week's Hip Kit Club challenge was to create a layout from a mood board. The mood board had several watercolor images that spoke to me and that was my starting point. The photos from Paige's birthday were perfect because of the colors and the balloons with dots. I grabbed a sheet of watercolor paper and my gelatos and got busy. Initially I thought I would try to mimic the bright, bold colors in the balloons. This photo is gelatos directly on dry watercolor paper.


Now is when the magic is supposed to happen, right? Not so much... As soon as I started adding water, it looked like a grainy, horrible mess. I tried to add more color while wet and it was obvious this was an epic fail.


Okay, let's take a deep breath and start over! I scribbled all the various colors onto a palette and added water with my paintbrush. Wow, what a difference a change in technique makes. The magic did happen... I was able to add more color to add some dimension. I also let a few of the circles dry then overlapped with a different color and the result is beautiful!


When the background dried, I was ecstatic, it's so soft, subtle, and the colors are so yummy they look like sherbet! I completed the layout with goodies from my kit and the challenge was complete.


Don't be afraid to try (and fail), it's how we learn new things. I'm glad I pushed through, these beautiful watercolor circles make me happy!

Sunday, January 11, 2015

YouTube for Inspiration

I don't know about you, but I'm addicted to YouTube videos. This week the lovely and talented Wilna uploaded a layout/tutorial that instantly got me inspired. Hip Kit Club's January kit was perfect for this tutorial. Part of her tutorial was painting white, die cut words with gelatos and using ribbons to match the selected colors. The Jan kit came with watercolor words (Dear Lizzy), it was a scrappy sign, for sure! :) I found a beach pic that I love and pulled out some Gelatos and paint to match the colors in the photo.


I then painted the words with the gelatos and some watered down paint. Just a quick tip, try not to over-saturate the words, they can tear quite easily. The paint color I chose to represent the sand was a little to warm, so I toned it down with Pumice Stone Distress Ink. I decided instead of matching ribbons, I would color my own using Pink Paislee's Mistables ribbon. I didn't want my ribbon to have any sheen and the linen texture of the Mistables ribbon is fabulous.


With just a few more embellishments from the kits, my layout was complete! If you haven't checked out YouTube for inspiration, you don't know what you're missing. Warning - It will be habit-forming. :) If you'd like to see Wilna's video, click here. If you are a YouTube junkie like me, please share some of your favorites.

Tuesday, September 30, 2014

Challenges = Quick & Easy Layouts

Just a short post today, sharing my latest layouts created for various challenges at Cocoa Daisy. I haven't had much time to scrap lately, and challenges are an easy way to get focused and complete layouts within small blocks of time.


I can't believe it's almost October - wishing you a fabulous fall, and the fun and cozy things that it brings! ♥

Saturday, July 26, 2014

Finishing the Challenges

This is the first time I have ever completed all of the challenges from a Cocoa Daisy crop! Yay, me! It did help that they reduced the number of challenges, but I'm still proud of my accomplishment. The first one is a scraplift challenge - I scraplifted a gorgeous layout by Martha and here is my take. Nothing like a little Christmas in July project.


The next was a challenge by Anna to create a project about home, without making a photo of your house the focal point. I decided to take a different approach and show our humble abode throughout the seasons. It represents not only the actual seasons, but also seasons of life. It's a reminder to myself that although things change, it's important to embrace the change and enjoy the moment. After all, there is beauty in every season.

I started with a 12x12 mixed media paper and taped off the 4 squares with washi tape. I used PanPastel to create the background. To create the tree, I stamped directly on the backside of my template and used a brayer to make sure the image came through. The leaves were created with a fun, little stamp from CD.


I truly love challenges, they help me think outside my comfort zone and push me to be more creative. Thanks, Cocoa Daisy for another fabulous and fun crop! ♥

Sunday, June 16, 2013

just relax...

So much easier said than done, don't you agree? This layout was inspired by a photo and a message board conversation about how I find it hard to relax. There is always something that needs to be done and I have to force myself to sit down and be in the moment. I'm not talking about relaxing while scrapping, I mean to really sit down and truly relax. I happened to be doing just that when I snapped this photo. I added some text and sparkles from the photo app called A Beautiful Mess.

This month's Pleased to Meet You Challenge is to take inspiration from Lisa. She has such a fun and fabulous style, it was easy to be inspired. She loves circles and the color aqua so I took those elements and got busy. I started with a sheet of watercolor paper and drew freehand circles with a Zig Emboss Writer. I then used white Zing embossing powder to make a resist for the paints I would be adding later. I repeated this with the Confetti stamp from Cocoa Daisy. I then used gelatos to draw circles around and over the embossed circles. I used a wet brush to blend the colors in and then used watercolors over that to create a soft look. I also painted circles with Heidi Swapp Color Shine (Teal) and I truly love the effect.

This is now my new favorite layout. I think I should hang this where I can be reminded often to just relax.

Thursday, March 29, 2012

Sampling of art

My class is winding down and I just wanted to share a few of the things I created. Thank you to Junelle Jacobsen, Christy Tomlinson, and all the talented ladies in the class for the inspiration.


Now it's time to clean up the art supplies and get back to scrapping -- it's been way too long!